Enhance your viewing experience by erasing the white dots that appear on your projector screen by following these steps. It’s a DIY guide and simple to follow.

White dots on your projector screen can be highly irritating and ruin your movie night. Moreover, it leaves you wondering that you might have bought the wrong projector screen for your projector.
But there is no need to worry if you suddenly see white dots appearing on your projector screen.
In this article, I will discuss the possible reasons why they appear on the screen and how you can fix it.
So, if you are all set to take your projector screen to the technician, read this article first.
These easy troubleshooting steps can spare you the hassle and save you money.
Identifying the source behind the problem
To fix the white dots appearing on the screen, you first need to identify the source of the problem.
The majority of times, you will find the source of the problem is the projector, but in rare scenarios, it can also be the screen causing the pain.
What leads to the projector causing the white dots?
The source behind the white dots appearing on your projector screen may be the projector itself. There can be two possible reasons behind it.
Failing of the DMD Chip
This is the most common reason behind the problem, especially if yours is a DMD projector.
A DMD Chip is a digital imaging chip that reflects light to project images on a projector screen.
When the DMD chip fails, the pixels also fail, causing white dots to appear on the projector screen.
The projector bulb
The dirt and dust accumulated on the projector bulb can also be a possibility of white dots.
When you don’t clean the bulb for a long time, it can cause white dots on the screen.
What leads to the screen causing the white dots?
When you don’t find an issue with the projector, you must examine the projector screen minutely.
It’s a rare scenario, but there can be an outside chance that the white dots on your projector screen have appeared because of tiny holes appearing on the fabric of the projector screen.
When you see these holes, you realize that the white dots are emerging because of the holes; all you can do to fix the problem is replace the screen.
Unfortunately, buying a new projector screen is the only solution if the problem lies in the screen.
How to Fix the Problem? When the problem lies in the projector
Fix the projector bulb
It is common to see white dots on your projector screen when you have not cleaned the projector bulb for a while.
As stated above, the dots appear because of the dust accumulated on the bulb.
In this scenario, you need to clean the projector bulb.
Steps to clean the projector bulb
- Switch off the projector for at least 30 minutes and let it cool down.
- Now, unscrew the back of the projector.
- Then, unscrew the lamp and remove the bulb carefully without touching the projector board.
- Choose a soft cloth, preferably white, to clean the bulb. Avoid touching the glass of the lamp. You can also use a blower to remove the dust particles from the light.
- Once you are done, screw the lamp and the projector’s back.
- Switch on the projector to check whether the white dots appear on the screen.
Steps to fix the DMD Chip
If the white dots have not disappeared even after cleaning the bulb and the screen, the problem can be because of a failing DMD chip.
Follow the steps below to fix the DMD chip,
1. Let the projector cool
Please switch off the projector and let it cool down for at least half an hour.
2. Remove the case
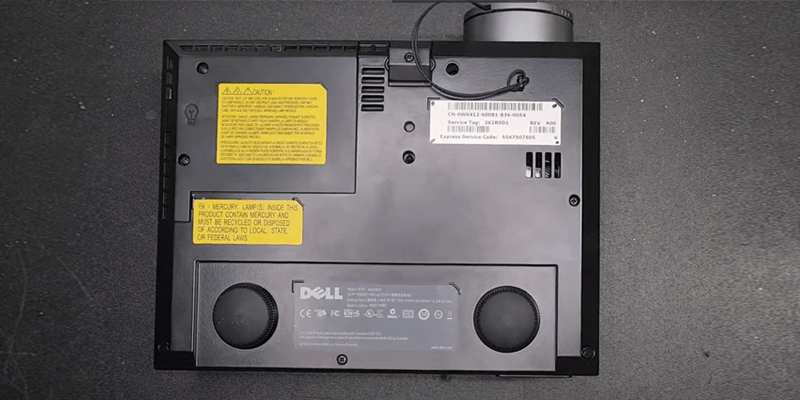
Next, you need to remove the projector’s case by unscrewing it. I suggest keeping the screws in the same place when unscrewing the projector to avoid losing the screws.
3. Clean the parts of the projector
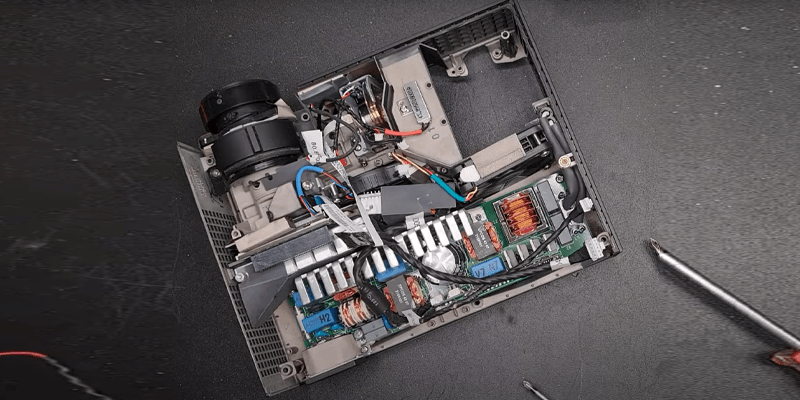
Before you touch the chip, clean the motherboard and other parts of the projector with a soft brush.
4. Remove the wires
After you have brushed the dirt away, it’s time to remove the wires connected to the main board.
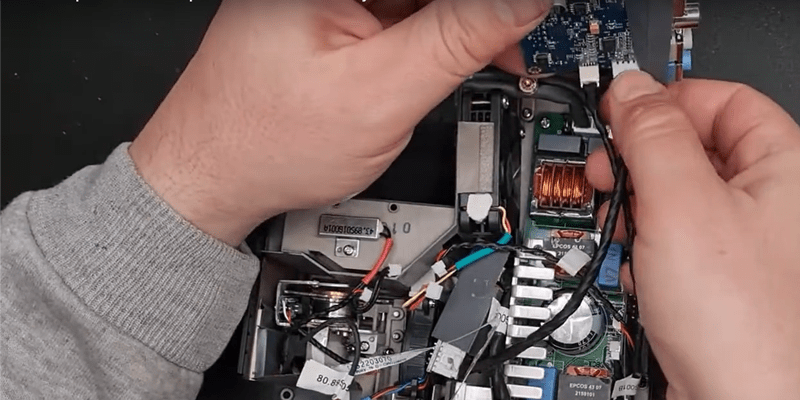
If you are doing this for the first time, you might get puzzled seeing the cables connected to the motherboard.
I advise you to take a picture before you unplug the wires so that when you are putting everything back together again, you don’t face any problems.
Or ask a friend to take a video of you while fixing the DMD chip. It can come in useful if you get confused at a later stage.
5. Remove the old chip with a suction cup
To remove the DMD chip, you will need a suction cup. It is a black rubber cup used to open cell phones.
After you remove the wires and the heat sink, carefully remove the DMD chip with the help of the suction cup.
6. Remove the paste between the heat sink and the chip
Take a cloth to wipe and remove the paste applied between the heat sink and the DMD chip.
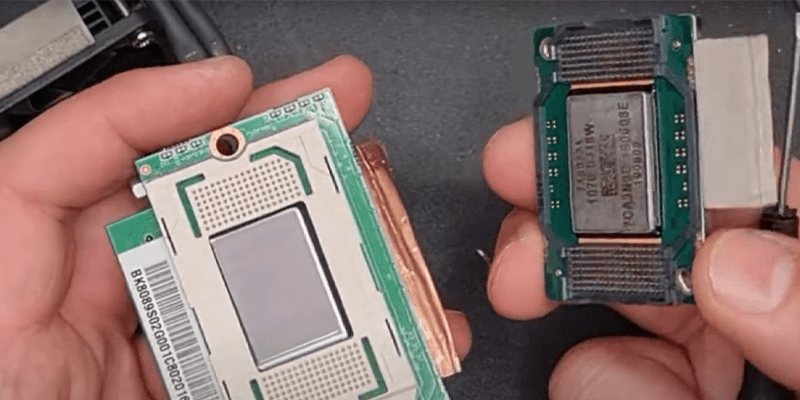
Make sure you wipe the paste entirely because the new paste won’t work over the old paste, and the projector will get overheated.
7. Replace the old chip with a new one
Apply the fresh thermal paste on the new chip and place it back in the same socket.
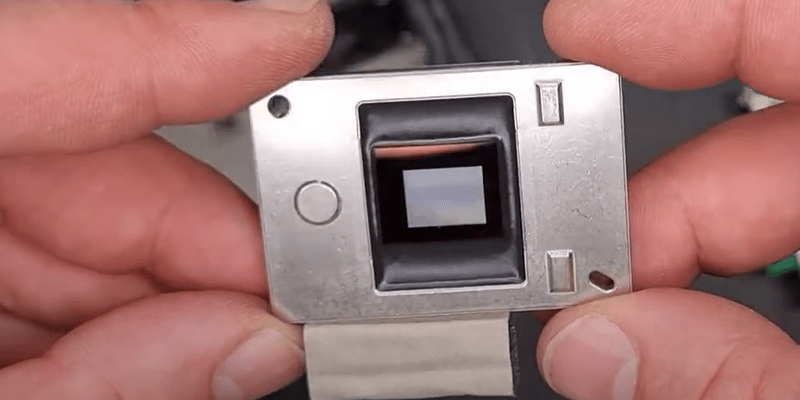
Now, put everything back and check the projector to see whether the white dots have disappeared.
If you still see the white dots after all this, I recommend you call a technician.
However, I am pretty much sure if you follow these steps, it will resolve the issue.
Final Takeaway
I hope this article helps you eliminate the white dots on your projector screen without much hassle.
Call for a technician if you see the problem still needs to be resolved after following these steps.
Let me know if you have any queries about the same.
Related: Projector Overheating: Why It Overheats, And How to Fix it?

